It’s That Time of Year Already: Reclaiming the Yard (Pt. 1)
Yes, it’s that time of year again. Spring is in full swing with summer close at its heels. Which means it’s time for us to roll up our sleeves and dig in.
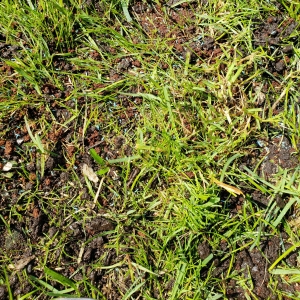
First stop: the lawn. The patchy, crabgrass-and-weed-ridden lawn that has been a sore spot the last few years. And if you’ve been following along thus far, you know all too well of my lawncare gripes and my lack of a green thumb. (I did not get that gene despite having several family members who are fantastic gardeners.) As far as the yard goes, we’ve done little lawn care this last year except spreading Scotts Weed and Feed when we remember to. The past two years, I have patch seeded a few of the bare spots which worked for a short while but the new grass was soon choked out by crabgrass and other weeds. At this point, I had all but laid my dreams to rest, of a lush, green lawn brought about by my own hands. The hubby and I began to discuss using a professional company to do the job since it seemed we had all but failed. Not that we had two extra pennies to rub together for such luxuries, but it was a thought nonetheless.
This year we – or rather I – decided to put forth one last ditch effort to have a lawn isn’t quite as cringeworthy. Since I’m home all day, most of the yard work falls to me and I’m determined to have some success this season. We put forth hours of research from various sites, came up with a plan and off we went. Home Depot – our home away from home – here we come!
Step one was dethatching the lawn. Scott’s describes thatch as “a layer of living and dead grass shoots, stems, and roots that forms between the grass blades and the soil surface”. A little bit is okay, a lot is problematic. Too much thatch can reduce the amount of oxygen and moisture that are able to reach the soil and grass roots. De-thatching removes the excess material so air, water, nutrients, and fertilizer can reach the soil better as well as allow your lawn to drain more effectively.
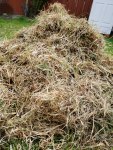
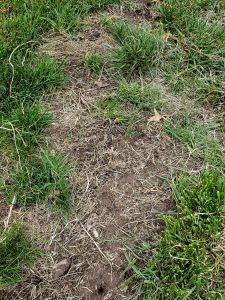
Now that you’ve had your vocabulary lesson for the day, it’s back to the work. Over the course of a few days, I cut the grass then worked to dethatch the lawn with the garden rake. (My back and shoulders were none too pleased about this.) It’s not the optimal tool but we tried to work with what we had, not wanting to put forth money for fancy tools we might only use once or twice. Again a rake wasn’t optimal and some areas were definitely harder than others, but after lots of sweat (and a few tears), it got the job done, leaving us with several piles of dead grass material.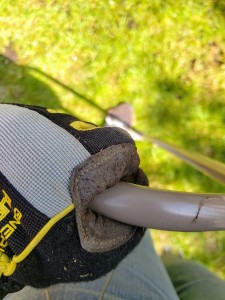
Step two was to aerate the lawn. I’ve found the best time to do this is when the soil is damp, which makes it easier to puncture the ground. Now there are two types of aerators, the first being more machine than a tool (at least all the ones I’ve seen are). A core aerator has hollow tines and pulls 2-in. deep plugs or ‘cores’ of soil and thatch up from the ground. You push (or pull) it along depending on the type. Since we have a very small yard, it seemed unreasonable to buy one (read $50+) and there were none available for rent the day we stocked up, so Plan B it was. Instead, we purchased a spike aerator with four ‘spike’ tines which create a row of 2-in. holes in the ground. You move across the lawn, stopping about every 8 inches to push it into the ground. It’s not quite as effective as the core aerator but it was much more budget friendly. My spouse was kind enough to do this two weeks ago when we first purchased. Unfortunately, it took me awhile to get to the backyard and so I went over the lawn with the aerator once more to be safe.
The final step: spread a thin layer of topsoil over the lawn followed by a mixture of grass seed. We used a mix since neither of us was certain what type of grass was actually growing in our lawn. That and we keep the lawn well watered and wait. It will be a couple of weeks before we see any success or failure so … fingers crossed!